
A great baby shower photoshoot captures the joy of expecting motherhood through thoughtful poses, flattering outfits, and the right environment. Whether you’re hiring a pro or going DIY, the key is choosing poses that showcase your bump comfortably, picking outfits that feel like you, and timing the shoot when light and weather work in your favor. We’ve gathered 20+ ideas from solo bump celebration to group shenanigans with friends—plus the real costs, timing tips, and pro photography techniques.
Why a Baby Shower Photoshoot Matters
This season of your life is temporary and unrepeatable and photographs freeze it forever. A well-done maternity shoot celebrates your body at its most powerful, creates memories you’ll treasure, and gives you confidence in your bump. It’s the one time a camera focuses entirely on you and this specific moment. Plus, years from now, your child will love seeing photos of their arrival being eagerly awaited.
The Best Time to Do a Baby Shower Photoshoot (Timing & Season Tips)
Timing is everything. Shoot too early and your bump isn’t defined enough. Shoot too late and exhaustion shows. Get it right, and you’re golden.
Ideal Pregnancy Week
Weeks 32–36 is the sweet spot. At 32 weeks, your bump is full and beautifully round. You still have energy and mobility for multiple outfit changes and poses. By week 36, your bump is stunning, but discomfort and fatigue start creeping in. Shoot in this window for photos where you look and feel like yourself.
Before week 32, your bump may be subtle enough that the photos feel less “pregnant” than you’d like. After week 36, late-pregnancy aches and swelling can show in your face and make movement uncomfortable. If you’re expecting multiples, check with your OB—earlier shoots (week 28–30) may be safer for you.
Best Time of Day: Golden Hour Magic
Golden hour—the first hour after sunrise or the last hour before sunset—is non-negotiable. The light is soft, warm, and flattering. It creates dimension on your bump (instead of a flat, harsh midday shadow) and makes skin glow naturally. You won’t squint. Your eyes won’t have ugly shadows underneath.
For UAE specifically:
- Winter (Nov–Feb): Shoot 7–8 AM or 4–5 PM
- Spring (Mar–May): Shoot 6–7 AM or 5–6 PM
- Summer (Jun–Aug): Shoot 5:30–6:30 AM or 6–7 PM (only viable windows; midday is dangerous heat)
- Fall (Sep–Oct): Shoot 6:30–7:30 AM or 4:30–5:30 PM
Pro tip: Overcast days are underrated. Even light, no squinting, no harsh shadows—they’re actually fantastic for maternity photos. Summer overcast? Book it immediately.
Best Seasons for UAE Climate
Best: October–April (mild temps 20–28°C, clear skies, perfect light)
Avoid: June–August (45–50°C heat makes outdoor shooting unsafe; your energy tanks; skin flushes)
Workable: May and September (early morning shoots only)
If you’re expecting during summer heat, move your shoot indoors to a studio with A/C and professional lighting. Your comfort is non-negotiable—you’ll look more relaxed and happy in a cool studio than wilted in 48°C heat.
Outfit Ideas: What to Wear for a Flattering Baby Shower Photoshoot
Your outfit frames your bump and communicates your vibe. The right one makes you feel powerful; the wrong one makes you self-conscious. Here’s what works.
Solo Bump Shots: Emphasize, Don’t Hide
The classic: Fitted crop top or sports bra (white, cream, or soft pastel) + high-waisted shorts or a linen skirt. This frames your bump perfectly and shows the silhouette photographers love.
The flowy option: A maxi dress or flowing sundress in breathable fabric (cotton, linen, chiffon). Twirl shots in flowing dresses photograph beautifully—movement adds drama and grace.
The minimalist: Just a linen skirt and no top (if you’re comfortable). Some moms opt for strategic styling (hand placement, angle of shot) rather than coverage. It’s your choice entirely.
Group Photoshoot Outfits: Coordinate Without Matching
Coordinate, don’t match. Have everyone in a pastel palette (blush, sage, pale yellow, baby blue) or everyone in denim + white or everyone in jewel tones (emerald, sapphire). Matching outfits look stiff; coordinated outfits look intentional and beautiful.
Keep everyone comfortable. No tight, scratchy fabrics. No one should be tugging at their clothes during the shoot. Breathable, soft, stretchy fabrics work for everyone—maternity or not.
Color & Fabric: The Rules That Matter
Colors that photograph beautifully: Cream, white, blush, sage green, soft yellow, dusty blue, emerald, sapphire, rust. These all look timeless in photos.
Avoid: Neon (photographs as harsh and dated fast), very dark black (unless you want an artistic silhouette), and loud patterns (they compete with your bump for attention).
Best fabrics: Cotton, linen, and lightweight blends. They breathe (especially important in UAE heat), they drape beautifully over a bump, and they photograph with natural texture.
Avoid: Anything itchy, overly tight, or heavy. You’ll be moving around and adjusting poses for 2–3 hours. If you’re uncomfortable, it shows in your face.
Read More: Jewelry Photography Service
20+ Baby Shower Photoshoot Poses to Steal
These poses work with any body type, any size bump, and any setting. Each one is designed to show off your bump while keeping you comfortable. Try them solo or adapt them for groups.
Poses 1–5: Solo Bump Celebration (Vulnerable & Powerful)
Pose 1: The Profile Bump Frame
Stand in profile, one hand cradling your bump from underneath, the other resting gently on top. Look toward the camera with a soft smile. This angle shows your bump’s full roundness and is incredibly flattering.
Pose 2: The Hands-Down Wonder
Stand facing the camera, bump bare (or in a crop top). Both hands frame your bump from the sides, fingers pointing down. Look straight at the camera or down at your bump with gentle eyes. Simple, powerful, timeless.
Pose 3: The Sneaky Peek
Look down at your bump with a soft, private smile—as if you’re having a secret moment with your baby. Hands frame the bump or rest on it. This pose captures intimacy and wonder. It photographs beautifully.
Pose 4: The Flowing Dress Twirl
Wear a maxi dress or flowing fabric. Gently twirl or sway. Capture mid-movement so the fabric creates dimension around your bump. The motion adds grace and the flowing fabric emphasizes the bump’s shape.
Pose 5: The Seated Bump
Sit cross-legged on the ground (or on a low stool) with your bump in full view. One hand rests on your bump, the other on your knee. Look at the camera or down at your bump. Seated poses are comfortable and show a different angle of your bump.
Poses 6–10: With Friends / Group Dynamics (Joy & Connection)
Pose 6: The Circle of Love
All of you stand in a circle, facing inward. The expecting mother is in or slightly in front of the center. Everyone’s hands reach toward the bump or rest on it. This pose is powerful, emotional, and beautiful—it shows your community.
Pose 7: The Protective Frame
Friends stand behind the expecting mother, wrapping arms around her shoulders or her upper bump area. Everyone looks at the camera. This pose feels supportive and tender.
Pose 8: The Sitting Squad
Everyone sits on the ground in a loose cluster. Some lean toward each other, some rest hands on the bump. Keep it relaxed and natural. Candid, intimate, and gorgeous.
Pose 9: The Jump-Around Joy
Candid, mid-jump, everyone laughing. This requires a fast shutter speed and patience (take 20+ shots to catch the peak moment), but the result is pure joy and authentic energy.
Pose 10: The Layered Sitting
Vary heights: some sitting, some kneeling, some standing. Everyone arranges organically around the expecting mother. This creates visual interest and makes group photos feel less static.
Poses 11–15: Partner / Significant Other Poses (Intimacy & Anticipation)
Pose 11: The Bump Kiss
Your partner kisses or is about to kiss your bump while you look down at both of them with a smile. One of the most tender maternity poses—it shows anticipation and love.
Pose 12: The Protective Hands
Your hands on your bump, their hands on top of yours (or vice versa). Stand side-by-side or at an angle. Look at the camera or at each other. Shows unity and shared anticipation.
Pose 13: The Forehead Touch
Foreheads touching, both looking down at your bump together. Intimate, soft, and beautiful. This pose shows connection without being staged.
Pose 14: The Back-to-Back Bump
Stand back-to-back, you turned slightly to show your bump profile, them looking over their shoulder at the camera. Creates a unique angle and shows the partnership.
Pose 15: The Sitting Embrace
You sit with your bump visible, your partner sits or stands behind you with arms around you both. Comfortable, relaxed, and shows genuine affection.
Poses 16–20: Creative & Thematic Poses (Playful & Memorable)
Pose 16: The Chalk Board Message
Hold a board with your due date, baby’s name (if you know it), or a fun message (“Baby Coming Soon”). Simple, popular for social media, and photographers love it because it’s a clean focal point.
Pose 17: The Maternity Gown Elegance
Wear a formal or semi-formal maternity gown. Think wedding-adjacent elegance. Drape fabric artfully, pose with hands framing your bump. Photographs as magazine-cover quality. (Popular in UAE for high-end shoots.)
Pose 18: The Waterside Wonder
By a pool, fountain, or beach. A flowing outfit catches the light off the water. The bump reflects slightly in the water. The open space and natural backdrop create stunning photos.
Pose 19: The Silhouette Shot
Position yourself with bright light behind you (backlighting). Your bump shows as a perfect outline in silhouette. This is a technical pose but results in iconic, artistic photos.
Pose 20: The Belly Painting (Optional)
Paint your bump with henna, temporary tattoo art, or washable paint (flowers, stars, baby names). Bare or covered slightly, bump is the canvas. Playful, unique, and Instagram-worthy. (Check that any paint is pregnancy-safe before applying.)
Props, Backdrops & DIY Setup Ideas
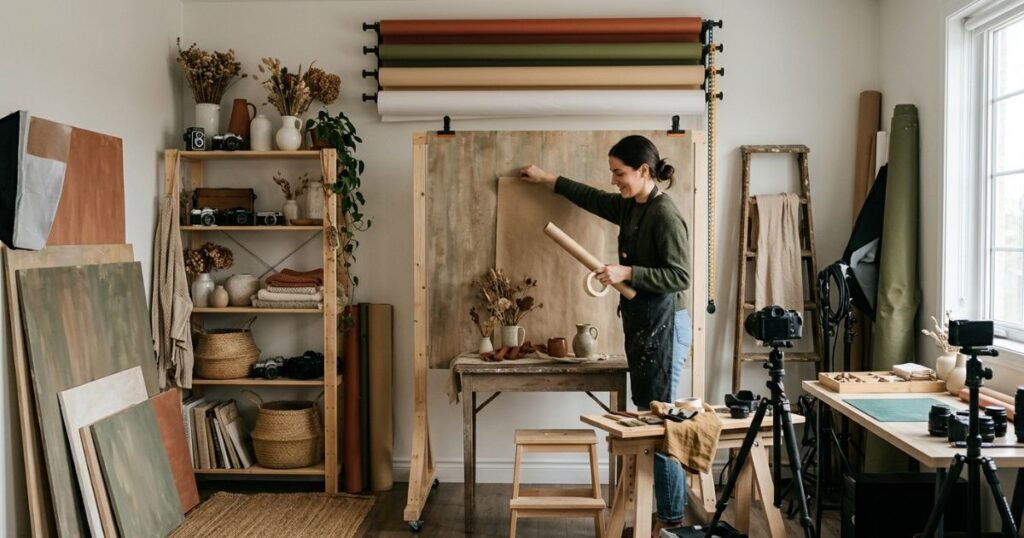
Props aren’t necessary—your bump is the star—but the right prop adds context and makes photos even more shareable and memorable.
Easy DIY Props (Under $100)
- Letter board with due date or name ($10–20): Clean, simple, professional-looking. Photographers love these.
- Flower garland or faux flowers ($15–40): Drape behind you or hold. Adds color and femininity without overwhelming the frame.
- Balloons in coordinated colors ($10–30 for a bundle): Cluster them for a backdrop or hold a few. Pastels and metallics photograph beautifully.
- Chalkboard with fun messages ($5–15): “Baby Coming Soon,” “Our Due Date,” or a funny line. Personalizes the shoot.
- Maternity sash ($5–15): Optional; drape across your bump for some shots.
Backdrop Ideas (Outdoor & Studio)
Outdoor:
- Garden or park: Lush green foliage is a free, beautiful backdrop. Shoot near flowering bushes or under trees for dappled light.
- Beach or waterfront: Open space, water reflects light, sand is soft for sitting poses.
- Urban or architectural: Brick walls, doorways, staircases, colorful walls. Great for modern, Instagram-aesthetic shots.
- Your backyard: Simplest option. Clean up, use a neutral wall or garden area. Golden hour through your backyard is gorgeous.
Studio:
- Solid backdrops: Neutral colors (white, beige, blush) are timeless. Some studios have textured backdrops (wood, brick look, painted).
- Floral or printed backdrops: A garden scene or soft-focused floral can add depth if you prefer less neutral.
- Green screen (advanced): Some studios offer custom backgrounds, but for maternity, simple solid or floral is usually better.
Cost-Saving Setup Tips
DIY backdrop: Hang a neutral sheet or fabric on a wall. Pin flowers or a garland to it. Cost: $5–20 total.
Borrow props: Ask friends if they have decorations, flower garlands, or photo props. Most people are happy to lend.
Thrift store finds: Vintage furniture, rugs, or frames ($2–10 each) can add texture and character to shots. Bonus: they’re one-of-a-kind.
DIY balloon arch: YouTube tutorial + fishing line + balloons = $20 and stunning photos. Takes an hour to assemble.
Enlist a friend as photographer: A good smartphone camera + your friend’s eye = free or cheap photos. Give them clear direction on composition and lighting.
Read More: Commercial Food Photography
Professional vs. DIY: Cost Breakdown & What to Expect
The biggest decision is whether to hire a professional or go DIY. Here’s the honest breakdown.
| Aspect | DIY Photoshoot | Semi-Professional | Professional |
| Photographer | You / friend with smartphone | Aspiring photographer (1–3 years experience) | Professional (5+ years maternity focus) |
| Total cost | 50–300 | 400–1,000 | 1,500–3,000+ |
| What’s included | Raw files (unedited) | 30–50 edited photos | 50–100+ edited photos, album options |
| Editing quality | None / DIY | Basic color correction | Professional retouching, color grading |
| Shoot duration | 1–2 hours | 2–3 hours | 3–4 hours |
| Location flexibility | 1 location | 1–2 locations | Multiple locations or studio + outdoor |
| Timeline to prints | Weeks (DIY editing) | 1–2 weeks | 2–4 weeks |
| Best for | First-timers, tight budgets | Quality on a moderate budget | Heirloom-quality memories, premium experience |
DIY works if: You’re comfortable directing a friend, you don’t mind unedited photos or basic editing, and you want the lowest cost.
Professional works if: You want to be in the photos with your friends, you want edited, gallery-quality images, and this is a special investment for you.
Photography Tips for Better Baby Shower Photos
Whether you’re the photographer or directing one, these techniques elevate your shoot from good to gorgeous.
Lighting Tips (The Most Important Part)
Golden hour is king: Shoot 1 hour before sunset or 1 hour after sunrise. The light is soft, warm, and impossibly flattering. Skin glows, the bump looks three-dimensional, and you won’t squint.
Avoid harsh midday sun: Direct midday light (11 AM–3 PM) creates ugly shadows under your eyes and chin. It flattens the bump. If you’re stuck shooting midday, find complete shade or move to an indoor studio.
Overcast days are underrated: Cloudy skies diffuse sunlight evenly. No harsh shadows, no squinting, no glare. Some photographers prefer overcast days for maternity work.
Use a reflector: A white piece of fabric, foam board, or a pop-up reflector bounces light into shadowed areas (under your chin, around your eyes). Cost: $15–30. Huge difference.
Camera Settings (Smartphone or DSLR)
If you’re using a smartphone, use Portrait Mode (it blurs the background and focuses on you). Most modern iPhones and Androids have this built-in.
If you’re using a DSLR or mirrorless camera:
- ISO: Start low (100–400) in bright light to avoid grainy photos
- Aperture: f/4–f/5.6 keeps most of your body in focus; f/2.8 blurs the background beautifully
- Shutter speed: 1/250th for any pose with movement; 1/60th for still, stationary poses
Composition Rules (Framing Matters)
Rule of thirds: Imagine a tic-tac-toe grid on your frame. Place your bump off-center (on one of the grid lines), not dead center. It’s more visually interesting and balanced.
Leading lines: Use paths, shadows, or architecture to draw the viewer’s eye toward your bump. A garden path leading toward you, a shadow falling across the frame—these create depth.
Negative space: Don’t fill every corner with props or people. Let the bump breathe. Empty space around you makes you the clear focal point.
Depth and layers: Include foreground, subject, and background. Stand in front of flowers, not right against them. This creates dimension instead of a flat, poster-like photo.
Read More: Product Photography Abu Dhabi
Conclusion
Your baby shower photoshoot is a celebration of this unique season—not a performance. Choose poses that feel good in your body, outfits that make you smile, and either a trusted friend or a professional who gets maternity photography. The best shot? Always the one where you’re genuinely happy. Weeks 32–36 in golden hour, outdoors or studio, with the right people or just yourself—this is your time. Go make memories.
FAQs
What should I do about stretch marks or skin concerns in photos?
Stretch marks are part of your pregnancy story—celebrate them or lighten them in editing, your choice. Professional retouching can soften their appearance. The truth: you look beautiful, and what matters most is that you feel confident in your skin.
How many outfit changes should I bring to a photoshoot?
Two to three is ideal. One classic option (crop top + bump), one flowy option (maxi dress), and one group outfit if friends are involved. More than three eats into shooting time and exhausts you.
Can I do a photoshoot if I’m not athletic or flexible?
Absolutely. Many of the best poses are standing, sitting, or reclined—zero flexibility required. Tell your photographer upfront, “I prefer comfort over acrobatics.” Any good photographer adapts.
What’s the best way to involve older children?
Keep shoots under 1 hour. Use candid shots—your older kid hugging your bump, kissing it, resting their head on it. Avoid formal poses with kids (they get bored). Have a non-shooting adult manage them between shots.
How do I choose a professional photographer in Dubai / UAE?
Look at their portfolio (check for strong maternity/bump work), read reviews from other maternity clients, confirm all pricing and package details, and book a consultation call. Ask: “How much experience do you have with bump photography?” and “What’s your reshoot policy?”
Can I retake maternity photos if I’m unhappy with the first session?
Many photographers offer a reshoot within 2 weeks if you’re unsatisfied. Always ask about reshoot policy before signing a contract. Good photographers stand behind their work.
What’s the best way to use maternity photos after birth?
Print a large canvas (24″ x 36″) for the nursery. Frame a favorite in your bedroom. Create a photo album. Use one for birth announcements. Years later, your child will love seeing these photos—they show the anticipation and love that surrounded their arrival.